更新日:2017年04月30日
0.環境
[CentOS] 6.4 (64bit版カーネル)
[Apache] 2.2.15
1.セットアップ
個人利用のレンタルサーバーでは有料のSSL証明書を使っていたのですが、 有効期限切れを機にフリーのものに乗り換えてみました。
Let’s Encrypt というサービスを利用します。
下記のマニュアルに沿って進めました。(その他の参考ページは末尾に記載)
まずは、任意のディレクトリに Let’s Encrypt クライアントをダウンロード。
# cd /usr/local/src
# git clone https://github.com/letsencrypt/letsencrypt
# cd letsencrypt
# ./letsencrypt-auto --help
お! helpだから使い方が表示されるかと思いきや、依存関係のあるパッケージがダウンロードされた・・・
しかも下記メッセージによると、どうやらPythonのバージョンが古くて失敗してるっぽい。
  :
(省略)
  :
Complete!
WARNING: Python 2.6 support is very experimental at present...
if you would like to work on improving it, please ensure you have backups
and then run this script again with the --debug flag!
ググってみると同じ問題で悩んでる人がいました。
さらに調べると下記ページに解決方法がありました。
CentOS 6系は Python 2.7をインストールする必要あり
実行コマンドは下記の通り。
# yum install python27 python27-python-devel python27-python-setuptools python27-python-tools python27-python-virtualenvpythonのバージョンを調べる。
# python --version
Python 2.6.6
(注) 2.6のままですが気にせず続行します。
(yum管理外でPythonをソースからビルドしてインストールすると letsencrypt-auto が動かなくなりました)
コマンドを再実行すると、Pythonが古い旨のメッセージはもう出なくなりました。
# ./letsencrypt-auto --help続けてドメイン認証を試みます。(以降【】内は読み替えて下さい)
# ./letsencrypt-auto --apache -d 【ドメイン名】エラーメッセージが・・・
Updating letsencrypt and virtual environment dependencies.......
Running with virtualenv: /root/.local/share/letsencrypt/bin/letsencrypt --apache -d 【ドメイン名】
Version: 1.1-20080819
Version: 1.1-20080819
The apache plugin is not working; there may be problems with your existing configuration.
The error was: NoInstallationError()
ユーザーガイドによるとApache2.2系だとapacheプラグイン(–apache)は使えないようです。
となると、下記の通りstandaloneかwebrootのいずれかを実行しないといけません。
If you want to use a webserver that doesn't have full plugin support yet, you can still use "standalone" or "webroot" plugins to obtain a certificate:(ユーザーガイド抜粋)僕の環境では、1つのサーバーに複数のvirtual hostを立てているので、webrootプラグインを選択しました。
さらにwebrootプラグインだとApache無停止でいけるそうです。
念のため、既に書いてあったSSL用のvirtual hostはコメントアウトしてApacheを再起動します。
#<VirtualHost *:443>
#    :
# 【省略
#    :
#</VirtualHost>
下記コマンド実行。
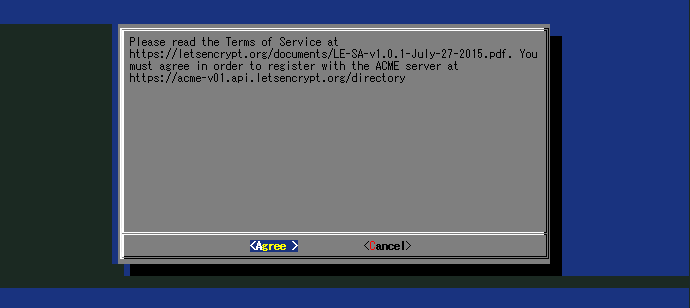
# ./letsencrypt-auto certonly --webroot -w 【ドキュメントルート】 -d 【ドメイン名】連絡用e-mailを入力し、利用規約を確認します。
下記のエラーが出ました。
Updating letsencrypt and virtual environment dependencies.......
Running with virtualenv: /root/.local/share/letsencrypt/bin/letsencrypt certonly --webroot -w 【ドキュメントルート】 -d 【ドメイン名】
Version: 1.1-20080819
Version: 1.1-20080819
Failed authorization procedure. 【ドメイン名】 (http-01): urn:acme:error:unauthorized :: The client lacks sufficient authorization :: Invalid response from http://【ドメイン名】/.well-known/acme-challenge/【省略】 [【サーバーIP】]: 401

IMPORTANT NOTES:
 - The following 'urn:acme:error:unauthorized' errors were reported by
   the server:

   Domains: 【ドメイン名】
   Error: The client lacks sufficient authorization
ドキュメントルートにファイルを配置して、インターネットからアクセスを試みているけど失敗してるっぽい・・・
試しにブラウザから上記URLにアクセス。
どうやら、port80(http)からport443(https)へのリダイレクト設定を入れていたことが原因のようです。
リダイレクトを無効にした後、ブラウザから上記URLにアクセスできることを確認した上で、再度サーバー上で下記を実行。
# ./letsencrypt-auto certonly --webroot -w 【ドキュメントルート】 -d 【ドメイン名】下記メッセージが表示され認証が成功!
Updating letsencrypt and virtual environment dependencies.......
Running with virtualenv: /root/.local/share/letsencrypt/bin/letsencrypt certonly --webroot -w 【ドキュメントルート】 -d 【ドメイン名】
Version: 1.1-20080819
Version: 1.1-20080819

IMPORTANT NOTES:
 - Congratulations! Your certificate and chain have been saved at
   /etc/letsencrypt/live/【ドメイン名】/fullchain.pem. Your cert will
   expire on 2016-03-04. To obtain a new version of the certificate in
   the future, simply run Let's Encrypt again.
 - If like Let's Encrypt, please consider supporting our work by:

   Donating to ISRG / Let's Encrypt:   https://letsencrypt.org/donate
   Donating to EFF:                    https://eff.org/donate-le
この後どうすれば・・・?
ユーザーガイドによると、apahceプラグインなら全自動で設定してくれるようですが、今回は使ってないので手動で証明書ファイルを設定しないといけません。
上記メッセージのパスを覗いてみると、必要なファイル一式がありました。
# ll /etc/letsencrypt/live/【ドメイン名】
#
lrwxrwxrwx 1 root root 38 12月  6 03:43 2015 cert.pem -> ../../archive/【ドメイン名】/cert1.pem
lrwxrwxrwx 1 root root 39 12月  6 03:43 2015 chain.pem -> ../../archive/【ドメイン名】/chain1.pem
lrwxrwxrwx 1 root root 43 12月  6 03:43 2015 fullchain.pem -> ../../archive/【ドメイン名】/fullchain1.pem
lrwxrwxrwx 1 root root 41 12月  6 03:43 2015 privkey.pem -> ../../archive/【ドメイン名】/privkey1.pem
fullchainを除く3ファイルをport443のvirtual hostに設定して、
<VirtualHost *:443>
    ServerAdmin  【メールアドレス】
    DocumentRoot "【ドキュメントルート】"
    ServerName   【ドメイン名】
    SSLEngine on
    SSLCertificateFile      /etc/letsencrypt/live/【ドメイン名】/cert.pem
    SSLCertificateKeyFile   /etc/letsencrypt/live/【ドメイン名】/privkey.pem
    SSLCertificateChainFile /etc/letsencrypt/live/【ドメイン名】/chain.pem

    ErrorLog  logs/【ドメイン名】-error_log
    CustomLog logs/【ドメイン名】-access_log common
</VirtualHost>
Apache再起動。
# service httpd restarthttpからhttpsへのリダイレクト設定も元に戻します。
ブラウザでサイトにアクセスするとSSLマークが表示されました!(ドメイン名はマスク済み)
Let’s Enctyptの証明書は有効期間が短いので、ついでに自動更新の設定もしておきましょう。(下記リンク参照)
組織の実在証明はありませんが、個人で暗号化メインならこれで十分ですね。何より無料がうれしいです。


